Seasonal discounts on select botanicals!
DIY Mushroom Grow Room: Monotub Cultivation Guide
Discover how to create a low-cost DIY mushroom grow room at home. Master monotub cultivation in India with our easy-to-follow guide on setting up a fruiting chamber and using CVG substrate for successful mushroom cultivation.
3/9/20263 min read
When you first discover the world of mycology, it is easy to get overwhelmed by images of massive commercial grow rooms, expensive humidifiers, and automated climate control systems. But here is the secret most commercial growers will not tell you: you do not need a high-tech lab to grow heavy flushes of mushrooms at home.
In fact, some of the best yields come from a simple, low-cost setup known as a "monotub." If you are interested in growing mushrooms at home in India, building a DIY fruiting chamber is the most cost-effective way to create the perfect microclimate for your fungi. Let’s break down exactly how to build one.
What is a Fruiting Chamber?
Mushrooms do not grow like plants; they require very specific environmental triggers to produce fruiting bodies. A fruiting chamber is simply an enclosed space that allows you to control two vital elements:
High Humidity: Mushrooms are over 90% water and need a highly humid environment (usually 80-95%) to grow without drying out.
Fresh Air Exchange (FAE): As mycelium digests its substrate, it exhales carbon dioxide (CO2). If CO2 builds up, your mushrooms will grow long, stringy, and deformed. They need a constant supply of fresh oxygen.
A DIY monotub perfectly balances holding in moisture while letting stale CO2 escape.
Materials You Need (Available Locally)
You can build a highly effective mushroom grow room setup for under ₹1,000 using items from your local hardware store or online marketplace:
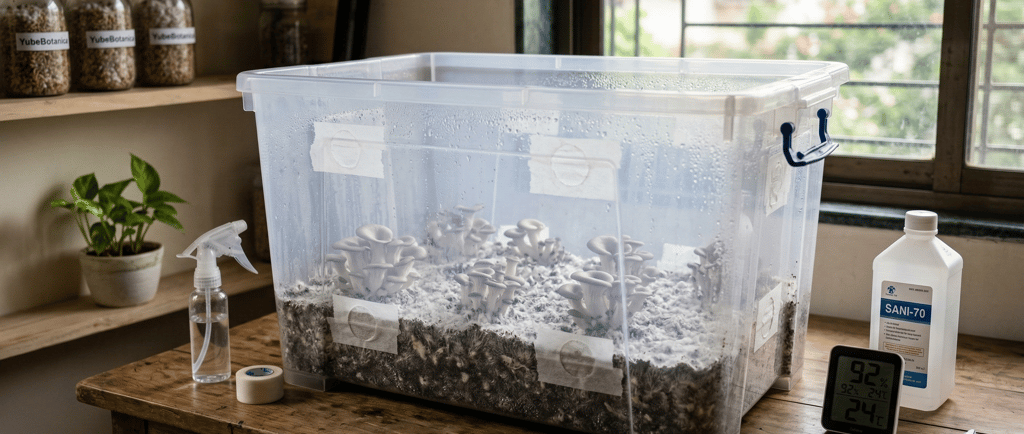
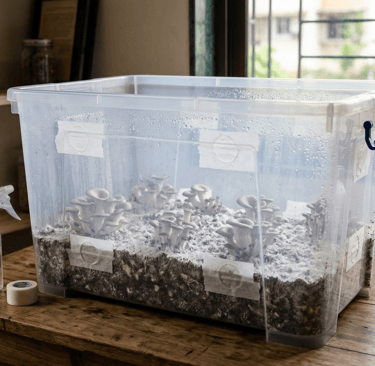
A Clear Plastic Storage Tub: Look for a 50 to 80-liter transparent bin with a tight-fitting lid. It must be clear so ambient light can reach the mushrooms to give them a growing direction.
A Drill or Heated Metal Pipe: To make airflow holes.
Micropore Tape or Poly-fil: Used to cover the holes, allowing fresh air in while keeping dust and mold spores out.
A Fine Mist Spray Bottle: For maintaining humidity.
Rubbing Alcohol (70% Isopropyl): For sanitizing your tub before use.
Step-by-Step: Building Your Monotub
Step 1: Drill the Airflow Holes
Take your clear plastic tub and create ventilation holes. The standard method is to drill (or melt) two holes on the longer sides of the tub, just a few inches above where your substrate line will be (usually 3-4 inches from the bottom). Then, make two more holes higher up on the shorter sides, near the lid. This creates a natural convection current to pull fresh air in and push heavy CO2 out.
Step 2: Apply the Filters
Wipe down the entire inside of the tub and the lid with 70% isopropyl alcohol to ensure it is completely sterile. Once dry, cover all the holes you just made with two layers of micropore tape. This acts as a breathable barrier.
Step 3: Dial in Your Climate
The climate in India varies wildly, and your tub will help you manage that. For example, maintaining that perfect 80-90% humidity in the dry northern plains takes a bit more daily misting than if you are growing near the coast in Navi Mumbai, where the heavy natural ambient moisture gives you a fantastic head start. Use your fine mist spray bottle to lightly mist the walls and lid of the tub whenever they look dry.
The Most Important Step: Filling Your Chamber
Your DIY fruiting chamber is only as good as what you put inside it. Once your tub is built, it is time to add your colonized grain spawn and your bulk substrate.
This is where many beginners fail by using poor-quality materials. For a massive, reliable harvest, you need a nutrient-rich base that holds moisture perfectly. Mixing your own substrate can be messy and prone to contamination if not pasteurized correctly.
For the best results, use a premium, pre-sterilized CVG substrate recipe (Coco Coir, Vermiculite, and Gypsum). At YubeBotanica, we offer perfectly hydrated, ready-to-use CVG substrate that takes the guesswork out of your monotub cultivation India journey. Pair it with a fast-growing, beginner-friendly strain like our Elm Oyster liquid culture, and you will be harvesting your own fresh mushrooms in just a few weeks.
YubeBotanica
One Shop For Mycology
Contact
Newsletter
YubeBotanica@protonmail.com
© 2024. All rights reserved.